Why the Garage Is the Hardest Room to Tackle
The garage accumulates what every other room rejects. Broken equipment, off-season gear, items earmarked for donation that never leave - they all end up here. Over time, the space stops feeling like a room and starts feeling like a problem. That psychological weight is part of why garages stay cluttered longer than any other area of the home.
The good news: garages respond well to a structured approach precisely because they don't carry the emotional complexity of living spaces. There are no sentimental photographs or childhood keepsakes hiding behind the lawn mower - or at least, far fewer of them. If you're still figuring out where to begin with the rest of your home, our room-by-room decluttering guide can help you build momentum before you reach the garage.
Before diving into steps, it's worth dispelling one common myth: buying more shelving or bins will not fix a disorganized garage. Containment without prior sorting just reorganizes the chaos. The process below addresses root causes first.
What You'll Need Before You Start
Gathering supplies in advance prevents mid-project trips that stall momentum.
What you will need
Heavy-duty trash bags
For bagging items destined for disposal during the sort phase.
Cardboard boxes or bins (unlabeled)
Used to create temporary sort piles by category before permanent storage is assigned.
Label maker or masking tape and marker
Marking zones and storage containers so contents are immediately identifiable.
Wall-mounted shelving or pegboard
Captures vertical space to keep floor areas clear and tools accessible.
Step stool or ladder
Safely accessing upper shelves and overhead storage areas during installation and retrieval.
Broom and shop vacuum
Cleaning the empty garage floor before reorganizing - reveals cracks, stains, or pest evidence.
Step-by-Step: Reclaiming Your Garage
Follow these steps in order. Skipping ahead - particularly past the full-empty and sort stages - is the single most common reason garage projects feel unfinished a month later.
Empty the Garage Completely
Move everything out onto the driveway or a nearby outdoor surface. This is non-negotiable. Organizing around items already on shelves or in corners leads to a partial result at best. Once the space is empty, sweep or vacuum the floor and let yourself see the raw square footage you're working with.
Sort Every Item into Categories
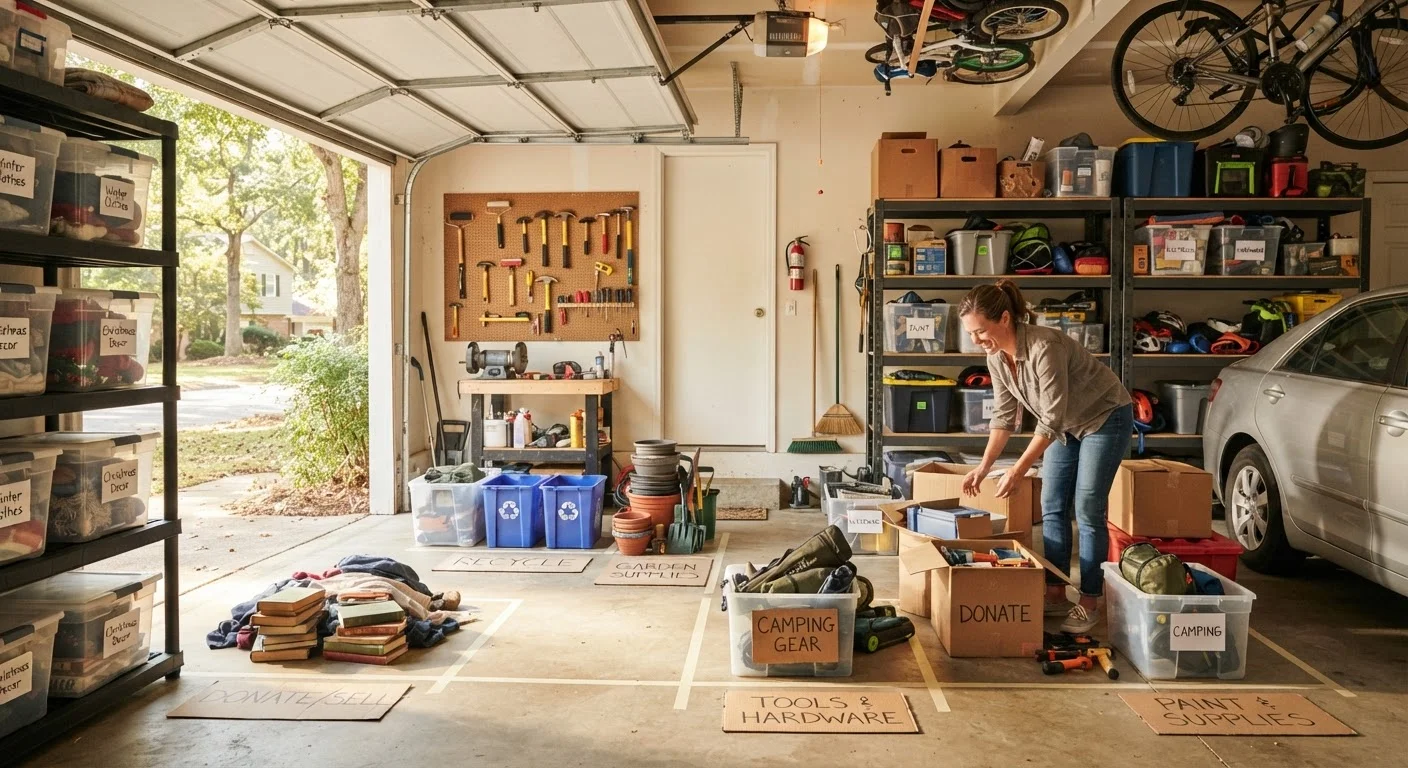
Working through the pile on your driveway, divide items into rough categories: keep, donate/sell, and discard. Within the keep pile, group by function - lawn and garden, automotive, sporting equipment, seasonal décor, hand tools, power tools, hardware. Don't let yourself get pulled into organizing yet. The goal here is only to know what you have.
Be honest about items that haven't been used in two or more years and have no clear upcoming use. Holding space for theoretical future projects is one of the most common reasons garages stay full.
Define Functional Zones Before Returning Anything
Stand in the empty garage and sketch a simple zone plan based on your categories and how often you use each. High-frequency items (everyday hand tools, sports gear used weekly) belong near the entry. Low-frequency items (holiday decorations, spare lumber) can go to the back or overhead. Identify where the car, if applicable, needs to fit - and protect that footprint first.
Common zones in a well-organized garage include: automotive, lawn and garden, workshop, recreational equipment, and seasonal storage. Not every garage needs all five - use only what applies to your household.
Maximize Vertical and Overhead Space
Most garages use less than half their available vertical space. Wall-mounted shelving, pegboards for hand tools, and ceiling-mounted racks for bulky seasonal items (kayaks, holiday bins, camping gear) can dramatically expand capacity without touching the floor footprint. Install shelving at heights that match the items they'll hold - heavier items lower, lighter ones higher.
When mounting any shelving or overhead storage to walls or ceiling joists, ensure fasteners are going into structural framing. If you're uncertain about load-bearing capacity or proper anchoring, consult a professional rather than guessing.
Return Items by Zone and Label Everything
Bring items back into the garage category by category, placing each within its designated zone. Use bins, shelves, or hooks as needed to keep items off the floor. Label every container, shelf section, and zone area clearly - the label is what makes the system usable by everyone in the household, not just the person who built it.
Establish a Re-Entry Rule for New Items
Decide now - before the project is complete - what the rule is for new items entering the garage. A simple principle: every item that enters needs an assigned zone and home before it's put down. If it doesn't have one, that's the signal to either create a zone or reconsider whether the item belongs in the garage at all. This single habit does more to prevent reversion than any storage product.
Keeping It Functional After the Work Is Done
The real test of a garage reorganization isn't how it looks on day one - it's how it holds up six months later. Zones only work if every member of your household understands and respects them. That means labeling storage clearly, assigning a home for every category, and making the return path as easy as the grab. Our guide on getting your household on board with organizing covers practical ways to share the system without becoming the sole enforcer.
Build in a brief seasonal review. A seasonal decluttering audit - even just 20 minutes per quarter - prevents the slow creep from returning. Items that don't have a zone tend to pile up on flat surfaces near the door. Interrupt that habit early, before a stack becomes a habit. For more on why flat surfaces attract clutter so reliably, see Flat Surfaces Are Not Storage.
Finally, resist the urge to fill every empty shelf immediately. Breathing room in a storage system is intentional - it's what lets the space absorb new items without breaking down.