What a Deck Project Actually Entails
Building a deck sounds straightforward - buy some lumber, fasten some boards, enjoy the outdoors. In reality, a deck is a permanent structure attached to or adjacent to your home, and it carries meaningful structural, safety, and legal responsibilities. Understanding the full scope before you pick up a shovel is the single most important step any homeowner can take.
A typical ground-level or elevated deck project involves site planning and layout, permit applications, footing excavation and concrete work, ledger board attachment (if the deck connects to the house), beam and joist framing, decking installation, railing and stair construction, and a final inspection. Each phase has its own skill demands, tool requirements, and potential failure points. Like knowing which car maintenance tasks are genuinely DIY-friendly - see our guide on DIY car maintenance limits - the same honest assessment applies to decks: some parts are very manageable for a capable homeowner; others carry real consequences if done incorrectly.
Permits and Code Requirements
In the vast majority of U.S. municipalities, building a deck requires a building permit. Requirements vary by jurisdiction, but most localities follow the International Residential Code (IRC) as a baseline, with local amendments. You will typically need to submit a site plan showing the deck's location and dimensions, a framing plan, and sometimes load calculations or a materials list.
Skipping the permit is a serious risk. Unpermitted decks can complicate home sales, void homeowner's insurance claims if the deck contributes to an injury, and require costly removal or retrofitting. Some jurisdictions require licensed contractors for permitted structural work - check your local building department before assuming DIY is allowed.
Permits Are Not Optional - Verify Before Building
Building without a required permit is not a technicality - it can result in stop-work orders, fines, required demolition, and complications when selling your home. Some lenders and insurers specifically require that permitted work be documented. Contact your local building department before breaking ground, and keep copies of all approved permits and inspection records.
Contact your local building department early in the planning process. Ask specifically whether your deck requires a permit, whether any portion must be done by a licensed contractor, and whether HOA approval is also needed. Regulations vary significantly even between neighboring towns.
Footings and Foundation Work
Footings anchor your deck to stable ground and prevent the structure from shifting as soil freezes and thaws. The critical dimension is the frost line - the depth at which soil in your area freezes in winter. Footings must extend below this line, which ranges from a few inches in southern states to over four feet in northern climates. Your local building department or code tables will specify the required depth.
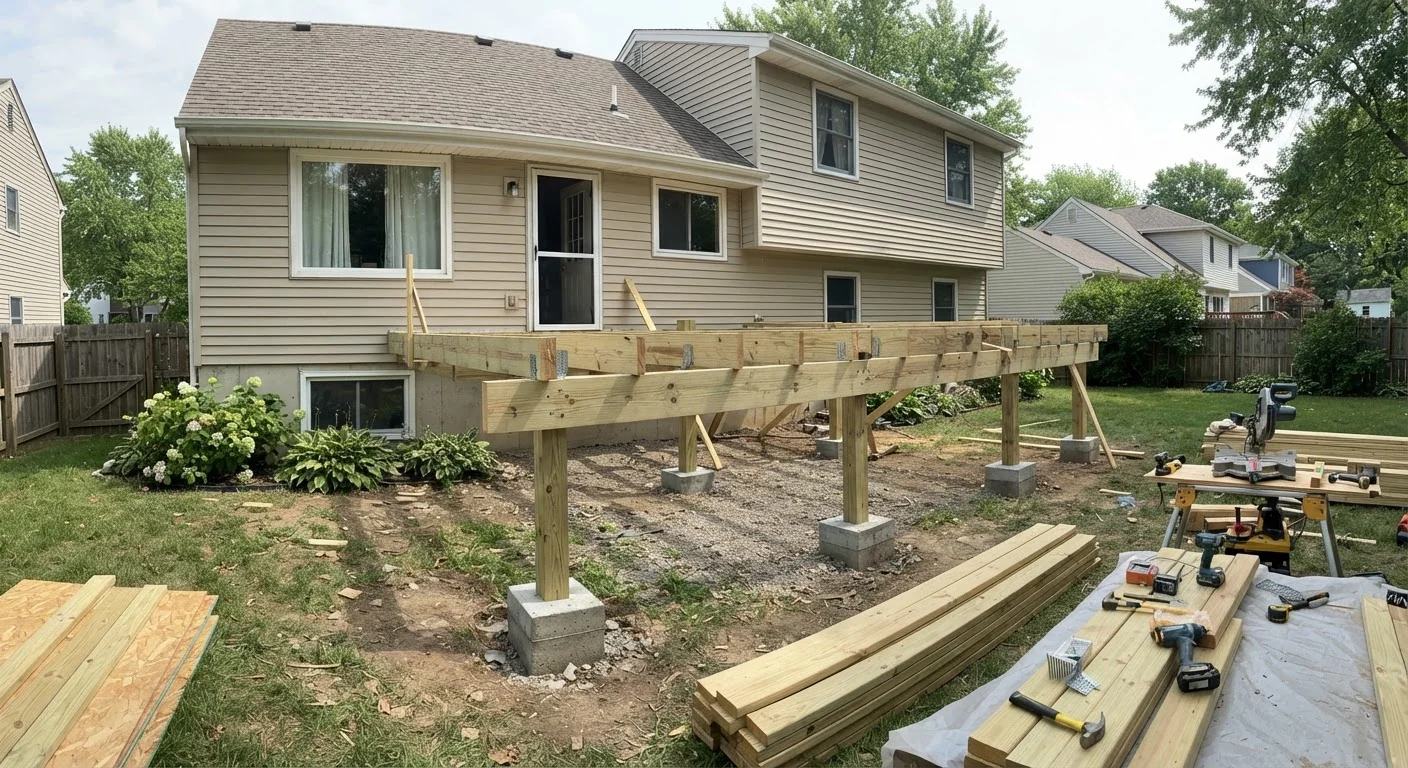
Most residential decks use round concrete piers poured into tube forms. The process involves digging or augering holes to the required depth, setting the tube form, placing a pre-made footing pad or pouring a base, and then pouring concrete around an embedded post anchor or directly around a treated post. Getting footing diameter, depth, and spacing right is critical - these dimensions flow from the load the deck places on each footing, which is calculated based on the deck's tributary area and anticipated loads (dead load from the structure, live load from people and furniture).
Footing work is physically demanding and technically specific. Renting a power auger makes excavation manageable, but the load calculations that determine footing size are not optional guesswork. Many building departments provide span tables and footing sizing charts - use them.
Ledger Attachment and Structural Connections
If your deck attaches to the house rather than standing free, the ledger board is the most structurally and waterproofing-critical element of the entire project. The ledger is a horizontal framing member bolted directly to the house's rim joist or band joist, and it carries a significant share of the deck's load.
When purchasing pressure-treated lumber for ground-contact applications (posts, ledgers, or any member within 6 inches of soil), verify the retention level on the end tag - look for UC4A or UC4B rating for ground contact. Standard above-ground treated lumber is not rated for soil contact and will deteriorate prematurely.
Using the wrong retention level is a common and costly mistake; the distinction is not always obvious at the lumber yard, and the consequences play out years later when posts rot at the base.
Before finalizing your deck layout, call 811 (the national 'Call Before You Dig' number) to have underground utilities marked. Many footing locations end up repositioned after this step.
Striking a buried utility line during footing excavation is dangerous and creates significant legal liability. The 811 service is free and required by law in most states before any excavation.
Two things go wrong most often with ledgers: inadequate fasteners and missing or improper flashing. Ledger connections must use code-specified lag screws or through-bolts in a pattern that matches the load - not whatever hardware is on hand. Equally important, flashing must be installed to direct water away from the house wall. Water infiltration behind an improperly flashed ledger is a leading cause of structural rot in both the ledger itself and the house's rim joist, sometimes going undetected for years.
Because ledger attachment affects the structural integrity of the house itself, many inspectors and contractors treat it as the single most important connection on the deck. If you are uncertain about your wall's framing composition (especially with stucco or engineered wood siding), professional assessment before attachment is strongly advisable.
Framing, Decking, and Finishing
Once footings cure and the ledger is secured, framing involves installing the beam or beams supported by the posts, then hanging joists from the beam and ledger using joist hangers. Joist spacing (typically 12 or 16 inches on center) is determined by the decking material's span rating and the anticipated load. Standard pressure-treated lumber span tables are widely available and relatively straightforward to apply once you understand the inputs.
Decking installation - fastening boards to the joists - is among the most DIY-accessible parts of the project. Maintaining consistent gaps between boards (typically 1/8 to 1/4 inch) allows for drainage and wood movement. Hidden fastener systems are popular for a cleaner look but add cost and installation time.
Railings and stairs introduce additional code requirements. Guards (railings) are required by most codes when deck surfaces are 30 inches or more above grade. Baluster spacing, rail height, and stair rise-and-run dimensions are all codified. Getting these right is important both for passing inspection and for genuine safety.
Where a Professional Is Often Worth It
Even skilled DIYers regularly hire out specific portions of a deck project. The areas where professional involvement is most commonly warranted include:
- Load calculations and plan review: If your building department requires stamped plans, a structural engineer or experienced deck contractor can provide them.
- Footing excavation in challenging conditions: Rocky soil, high water tables, or steep slopes may require equipment or expertise beyond typical DIY tools.
- Ledger attachment through complex wall assemblies: Stucco, EIFS, or structural insulated panels require specific attachment methods that can be difficult to execute correctly without experience.
- Electrical work: Outdoor lighting, receptacles, or ceiling fans on a covered deck involve electrical permits and, in most jurisdictions, licensed electrician work.
Hiring a professional for one or two critical phases while completing the rest yourself is a practical and legitimate approach. Always verify contractor licensing and confirm they will pull permits in their name if required.
A well-built deck adds genuine value and livability to a home. Going in with an honest understanding of what the project involves - including where your skills and tools have limits - is what separates a successful build from a costly problem.